Wednesday, 2 October 2013

Side Dish of the Week: Garlic and Basil Roast Potatoes

An excellent accompaniment to a roast dinner, or a meat dish such as stuffed chicken breasts! I never cook roasties without spicing them up a little and here I've used lots of garlic and basil to give an intense flavour! I love the colours in this dish too.

Basically, what you need is about a bulb and a half of garlic (bashed to bits with the skin on), some potatoes that have been peeled and chopped, Olive and Sunflower Oil, salt and pepper and, of course, plenty of freshly torn basil! Boil your taties until they are really soft. Whilst they are boiling, put a roasting dish with a layer of sunflower and olive oil poured over the bottom into an oven preheated to 180 degrees. Once the potatoes are soft drain them and place them into the hot oil. Sprinkle over the garlic, salt, some whole peppercorns and some freshly cracked ones and pour over just a little more oil. Roast on a middle shelf in the oven for about 40 minutes, stirring occasionally. Turn the oven up (if you're making a roast dinner this is the bit when the Yorkshire puddings go in!) high and finish the potatoes off by crisping them up a little. Take out of the oven and stir through the basil. Serve intermediately!

Whitby Potted Crab

This was my starter for the York Young Chefs competition.  This photo was my practice of the dish (that's why the toasts are a bit burnt!), unfortunately I didn't get any photos there! I actually served it on a long slate with a drizzle of balsamic, I also used different bread for the crostinis and I served it with a Langoustine instead of King Prawns. This starter got 10/10 for presentation in the form that I presented it in the competition and the judge also said the taste of the crab was excellent and he would happily order and pay for that in a restaurant - so that made me happy!

Ingredients (serves 2):
The white meat from about 2 Whitby Crabs, checked for any bits of shell
About 90g Wensleydale butter
1/2 Red chilli, deseeded and finely chopped
Juice of half a lemon
1/2 tsp freshly grated nutmeg
2 Bay Leaves

Method:
  1. Melt 50g of the butter in a sauce pan and add most of the chilli, all of the lemon juice and nutmeg and all a pinch of salt. Cook for a few minutes until butter is completely softened, take off the heat and stir in the crab. Put the crab in two small jars/ramekins and pack down.
  2. Melt the remaining butter in a clean pan. When it is foaming, remove from the heat and skim off any scum.
  3. Pour the clear butter over the crab in the pots. Sprinkle over remaining chilli and place a bay leaf on the top for decoration.
  4. Leave to set in the fridge for at least one hour. Serve with toasts/crostinis, salad and prawns or langoustines. A simple yet impressive starter.


Alice's Yorkshire Risotto

This was my entry into the York Young Chef's Competition that I recently took part in. It was my first cooking competition and I was very nervous! I didn't win but I did get complimentary comments for the judges, which is good as I was the only one of the contestants who wasn't a professional chef! The dish had to be sourced from Yorkshire and themed around Yorkshire produce so I used Yorkshire Beef, Yorkshire Blue Cheese, Masham Black Sheep Riggwelter Beer, Yorkshire Butter, Parsley grown by myself in Yorkshire and the Arborio rice itself was bought from a little shop in Masham!

Ingredients (serves 2):
300g Arborio Rice
3 Small Shallots, finely chopped
Handful of chopped Mushrooms
About 3/4 Litre Chicken Stock (see Alice's Basic's section)
2-3 Garlic Cloves, finely chopped
About 80g Yorkshire Blue Cheese, crumbled (from the Wensleydale Creamery if possible!)
1 Rump Steak
About 150g Wensleydale Butter
1 Bottle of Riggwelter Black Sheep Beer

Method:
  1. In a bowl place the steak, sprinkle with a little salt and pour over most of the beer - saving enough for a splash in the risotto and a few swigs for the cook! Put to one side.
  2. Begin to gently heat the stock in a saucepan as it needs to be hot as you add it to the risotto.
  3. Sauté chopped shallots in a good nob of butter until softened, using a wok-style pan. Add chopped mushrooms and garlic for a further minute.
  4. Add the rice to the pan and stir until it is coated. Add a splash of beer and reduce for a minute or two.
  5. Begin ladelling the stock into the risotto, one ladel full at a time, making sure that each addition is fully absorbed before adding the next - stirring continuously.
  6. When it is just about ready (the rice should be puffed up and still a little chewy to taste, al dente) prepare the steak by heating a griddle pan, removing the meat from the marinade and brushing with oil, salt and pepper. Fry for about 2 minutes on each side, wrap in foil and sit aside to rest.
  7. Pour the marinade into the still hot stock pan (even if there is a little stock left) and whisk in a tea spoon or so of cornflour to thicken and create a jus/sauce for decoration.
  8. Stir the blue cheese, parsley and more butter through the risotto.
  9. To serve, pack risotto into small glass chefs bowls, turn out into or onto warmed bowls/plates. Slice steak and place over the top with a sprig of parsley. Do a fancy circle of jus around the edge of your serving dish. And there you go, my own version of Yorkshire in a dish!


Balinese Chicken in a Noodle Basket

This is actually really just a recipe for the Noodle Baskets as for the Balinese Chicken I used a pre-made curry paste and just added the chicken and some onions. But, it's the first time I've made noodle baskets and they're an attractive and tasty, crunchy addition to a plate! You can fill them with many other things: curries, stir fries, vegetables etc.


Ingredients:
Noodles, I used vermicelli style noodles but you can use any you like
Cornflour
Salt 
Pepper
Pinch of Cayenne Pepper and a pinch of Turmeric (optional)
Sunflower or Vegetable Oil (for deep frying)

Method:
  1. If using dried noodles, cook them in boiling water. 
  2. Place your noodles on some kitchen roll and spinkle over salt in order to drain as much moisture as possible. Leave for 5 minutes occasionally tossing.
  3. Begin to heat your oil on a medium-high heat in a deep heavy-based pan. Be VERY careful with this, it can be extremely dangerous. Do not leave this pan unattended at all. 
  4. Toss noodles is a bowl with spices, cornflour, salt and pepper making sure they're well covered.
  5. When oil is ready (text by dropping in a small piece of bread and seeing if it sizzles) arrange your noodle baskets one by one by placing noodles in a circle around a medium size sieve. 
  6. Some recipes recommend pouring the oil over the baskets but as this is a little dangerous I dipped by baskets by holding the handle of the sieve into the pan of oil. They will cook very quickly, in no more than 4-5 minutes each. You can keep the nests warm and crisp them up a little more in the oven while you cook the rest if you like. Voila, once cooked serve with something nice, I served mine with Balinese Chicken and some greens. Dispose of your oil carefully. 


Gozleme (Stuffed Turkish Bread)

This was a recipe that I came across on the internet. Turkish food is something that I think is much over looked in Britain. The flavours are lovely and I've often wanted to create them at home. But due to lack of recipes I haven't sallied into Turkish Cuisine that often. So here is my version of a Gozleme recipe. I think next time I might roll the bread thinner, make then smaller and find an easier way of stuffing them but I don't think they've worked out too bad for a first attempt! You can stuff them with whatever you like - I chose Spinach, Onions, Feta Cheese and Diced Chicken Breast.
Ingredients (makes about 6):

For the bread dough: - 
300g Plain Flour
300ml Warm Water
1 7g Sachet of Yeast
1 and a half tsp sugar
Olive Oil

For the stuffing: -
As I said in the introduction you can use anything you like here but I used 2 Chicken Breasts (diced), 1 bag of spinach, 1 block of Feta cheese (crumbled) and 1 Onion (finely sliced). I fried the Chicken and Onion together in some oil and garlic until cooked then added the Spinach. I added the feta on top when stuffing the breads later.


Method:
  1. Mix the warm water, yeast and sugar and leave somewhere warm for the yeast to ferment until frothy. (Usually about half an hour).
  2. Sift flour into a bowl with salt and olive oil. Add yeast to mixture, combine and then turn out onto a floured surface and knead with the heel of your hand for at least 10 minutes.
  3. Divide the dough into about 6 balls and place onto a greased baking tray, cover with a clean tea towel and leave somewhere warm to rise for at least half an hour.
  4. Dust a clean surface with flour and dust your rolling pin. Knock the dough back and then roll each ball into a rough rectangle, quite thinly. Lightly brush the surface with oil and fold the sides, left and right, into the centre. (Next time I might do this with circles instead of rectangles as it might work easier).  Rotate the dough around (about 90 degress) and roll out into another rectangle. Repeat first rectangle and fold/roll again.
  5. Making sure your filling is warm and ready to use, heat a pan (I used a Chapati pan as it should be flat-based) and brush dough surface with oil. Place filling on one side of the dough. Here I added the chicken mixture then sprinkled the crumbled feta over the top. Fold the empty half of the dough over the filling and pinch the sides together to make a parcel. Brush the surface with Olive Oil once again.
  6. Lay onto the pan and cook each side until lightly browned, brushing the top side with oil before flipping over. It's difficult to cook 6 at once so I wrapped my first few gozlemes in foil and kept them warm in the oven before serving. Perhaps make less if it's just for a small meal. Serve straight away, I served mine with Greek yoghurt and salad. Delicious!


Stuffed Marrows

Recently I was given a load of marrows/courgettes from a neighbour of Paddy's Mam and Dad. So I stuffed them. I served these with a salad and they're a great Vegetarian alternative! I made two large stuffed marrows, but one is enough for two people. You can really use any other vegetables to stuff this too - or meats if you like! Added Chorizo would be nice.
Ingredients:
1-2 Marrows
1 punnet of Mushrooms, roughly chopped
1 Green Pepper and 1 Yellow, roughly chopped
Handful of Cherry Tomatoes, roughly chopped
5 or more cloves of garlic, finely chopped/crushed
Red and Green Chillies (optional) finely chopped
Splash of White Wine
Squeeze of Tomato Puree
Breadcrumbs
A cheese of your choice (I used Mature Cheddar)
Salt and Pepper (to season)

Method:
  1. Preheat the oven to 190 degrees. Heat Olive Oil in a large pan.
  2. Slice marrow in half and scoop out the inside, leaving a thin layer around the sides. Chop the insides into bite-size chunks.
  3. Add garlic and chilli to pan and fry for a minute or two, add all the remaining veg - including the insides of the marrow - and stir fry until cooked/softened.
  4. Add wine and tomato puree, season and stir.
  5. Put veg mixture into marrow halves. Sprinkle breadcrumbs and cheese over the top and drizzle oil over the top. bake in the oven for 20-30 minutes or until breadcrumbs turn golden in colour. Serve either whole or sliced!


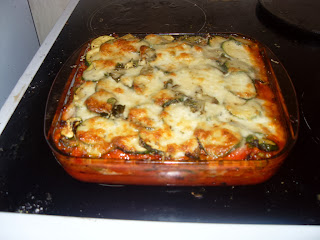
Tuna and Courgette Lasange

This is a quick and easy tea to make and is extremely tasty!

Ingredients (makes about 4 portions):
Enough of Alice's Basic Tomato Sauce (see Alice's Basics section)
2 Tins of Tuna
Medium bowl of frozen peas
9-12 Lasange Sheets
2 Mozzarella Balls
2 Courgettes (finely Sliced)
1 Red Onion (finely Sliced)
Handful finely grated Parmesan
Generous handful chopped Parsley
4 Garlic Cloves, finely chopped/crushed
Low fat natural yoghurt 
Olive Oil
Salt and Pepper
Splash of White Wine

Method:
  1. Fry the courgettes and garlic in oil in a wok/frying pan until gently browned then set aside on a tray lined with kitchen roll for later.
  2. Next preheat the oven to 180 degrees and add the onions (and more oil if needed) to the pan. Once the onions begin to soften add the splash of wine and cook off the alcohol before adding the tomato sauce (save a little back) from Alice's Basics. You can make the tomato sauce as you go along or add some you made earlier. Season to taste.
  3. Once the sauce is the right consistency stir in the tuna, peas and a large tablespoon of natural yoghurt. Cook for a further minute or two and now it's time to build the lasange!
  4. In an ovenproof dish of your choosing pour in the remaining tomato sauce and spread across the bottom. Lay a layer of lasange sheets (3-4) then spread over a layer of your tuna/tomatoey sauce. Dot with courgette circles, torn bits of mozzarella, natural yoghurt (if you like) and parsley.
  5. Repeat this 2-3 times until dish is almost full then top with a layer of lasange sheets, spread over some natural yoghurt, lay over courgettes in a 'fish scale' type arrangement. tear over mozzarella and sprinkle with Parmesan and Parsley. Drizzle over a little Olive Oil and put in the oven on a middle shelf. Bake for 20-25 minutes and serve!


Friday, 6 September 2013

The Truffle Trilogy Part Three: Truffle Linguine

Here it is, the third and final part of my trio of truffly delights! This is actually my personal favourite of the three recipes. The strong truffle taste was simply divine when coating the pasta - enjoy (I know I did!)
 Ingredients (serves 2):
Enough dried Linguine for two
One whole Black Truffle (once again shaved with a fine grater)
3 finely chopped garlic cloves
1 finely chopped white onion
Truffle Oil
Extra Virgin Olive Oil
Pinch of Salt
Freshly ground black Pepper
Plenty of freshly and finely grated Parmesan Cheese
Method:
  1. Put the pasta on the boil. Add a glug of each oil to a wok-style pan on a medium heat. 
  2. Add the chopped onions and fry for a minute or so before adding the garlic. Add most of the shaved truffle.
  3. When the linguine is al dente, drain it but add a little of the pasta water to the pan when you add the pasta itself next. Make sure the pasta is covered in the oil mixture - adding more if necessary - and stir in the salt, pepper and a little Parmesan.
  4. Make sure everything is evenly distributed throughout and serve with more Parmesan grated on top and decorate with truffle shavings. An elegant yet simple dish!


 Serve with a nice dry, perfectly chilled Italian White Wine!

The Truffle Trilogy Part Two: Porcini and Truffle Risotto

Part Deux of the Truffle Feast! This is the most substantial meal of the trio - in fact I seem to have inadvertently created a full day of truffles with Part One as breakfast, Part Three as Lunch and this recipe as dinner, or tea (whatever you like to call it).

Ingredients:
Enough Arborio or Carnaroli rice for 2 (I used some Arborio that was already mixed with some dried truffle)
Packet of dried Porcini (I used about 70g)
1 Whole Black Truffle, shaved
About 1 pint and 1/2 Chicken Stock (you can use vegetable if you wish but I think the chicken compliments the mushroomy flavour)
Pepper
A good handful of finely grated Parmesan cheese
Butter
1 Onion, finely chopped
1 Garlic Cloves, finely chopped (I didn't use much garlic here as I don't want it to overpower the mushrooms)
Dash of White Wine
Add the stock, one ladel at a time.

Method:
  1. Firstly, the dried mushrooms need to soak for at least 15 minutes. After that add half of the mushroomy water to your stock and chop the Porcini, leaving two-four whole for decoration later.
  2. Heat a knob of butter in a large pan/wok on a medium-high heat. Add the onions, chopped Porcini and garlic and fry for a few minutes. Also add a dash of wine. Whilst doing this also bring your stock to a medium heat on another burner.
  3. Add the rice to your large pan and make sure it is coated in the buttery/oniony/mushroomy mixture. You can add a little bit of truffle oil at this point too if you like.
  4. Begin adding the stock, one ladel at a time (see the picture above). Make sure each ladel of liquid is completely incorporated into the mixture before adding the next. Also make sure you have a radio or something to listen  too whilst doing this as it will take about 20-25 minutes.
  5. When done the rice should still be a tiny bit saucy (I think I didn't add enough stock to mine). Take off the heat and stir a little Parmesan, most of the truffle shavings, some freshly ground black pepper and another good few nobs of butter through the Risotto.
  6. To serve, plate up and sprinkle over truffle shavings and a little Parmesan and decorate with Porcini. Mushroom-tastic!


The Truffle Trilogy Part One: Truffled Eggs

Hello and welcome to the The Truffle Trilogy! As a present I bought Paddy a jar of 3 truffles, so I've come up with three simple recipes to show them off! The first, truffled eggs, we ate for a breakfast before attending Ladies Day at York Races. We had them in the garden with Champagne and it was lovely!

Ingredients (serves 2):
4 farm eggs
splash of milk
1 Whole Black Truffle (Shaved - I used a fine grater)
Salt and Pepper
Handful of freshly chopped flat leaf Parsley
Truffle Oil


Method:
  1. Heat the oil - a good tbsp of - in a pan on a medium heat.
  2. Lightly beat the eggs with a splash of milk.
  3. Pour into pan and gently whisk as the egg begins to cook and scramble.
  4. Add half the shaved truffle, salt, pepper and most of the Parsley.
  5. You want the eggs to still be quite moist and juicy so keep a close eye on them, it doesn't take long until they're done. When they are serve on either a lightly toasted thin slice of brown bread, or as in my case, on one of last night's homemade chapatis, for something different. Sprinkle the remaining truffle shavings and parsley over the top and finish with an extra couple of squirts of truffle oil and some freshly ground black pepper. Delicious.

Wednesday, 4 September 2013

Mozzarella Chicken Supreme with Spring Onion and White Wine Linguine

This was a bit if an impromptu tea that turned into a new recipe for the blog. I was really fancying chicken and we also had two Mozzarella balls that needed using in the fridge. We didn't have that much else in so I managed to come up with this! It's actually a much simpler recipe than it sounds and it worked out very tasty - especially the sauce which is a new creation of mine!

Ingredients (serves 2):
2 Chicken Breasts
Mozzarella, sliced (I used 2 balls but one would be enough as long as, unlike me, you don't eat it as you cook along!)
1 Onion (finely chopped) A leek would also work well instead
5-6 Spring Onions, finely sliced
3 Garlic Cloves, finely chopped
2 Oxo Stock Cubes, chicken flavoured
About 1 tbsp Plain flour
Olive Oil
Salt and Pepper
White Wine
Chicken Stock 
Small drop of White Wine Vinegar
Enough Linguine for two, boiled until al dente
Broccoli (optional accompaniment)   
Butter
Method:
  1. Make a paste with some Olive Oil, crushed Oxo cubes and a little salt and pepper either with a Pestle and Mortar or your fingers in a bowl and set aside.
  2. Begin the sauce by lightly frying onions (not the spring onions yet) in some butter - just a medium size nob. Use a deepish pan with a cover or lid. Add the garlic and fry for a couple of minutes. Add the flour and either whisk or quickly stir while turning the heat up a little. Add the white wine - a good glug - and cook off the alcohol. Add some chicken stock and white wine vinegar to bring the level in the pan just enough to cover breasts when in pan. You can use just stock or just wine here according to preference.
  3. Flatten each breast between sheets of cling film using a rolling pin. Heat up a griddle pan with a little oil and wrap flattened breasts around a few bits of mozzarella. Rub paste into the outside of the chicken breasts. Place each breast onto the griddle and fry for just about a minute on each side until just browned. This will seal the meat.
  4. Place the breasts into the simmering sauce (ensuring that the liquid just about covers the breasts), cover and simmer on a low-medium heat for 15-20 minutes or until the meat is cooked. When cooked remove the Supremes and individually wrap tightly in foil - this allows them to retain all the tasty juices.
  5. Meanwhile, prepare the pasta and any accompaniments, as I say I used broccoli. Turn up the heat a little on the pan of sauce. When everything is just about ready and the sauce has thickened stir in the remaining mozzarella, spring onion and season to taste.
  6. Toss the linguine in the sauce and use tongs to serve onto a heated plate, unwrap the Supremes and place on top. Pour over remaining sauce left in the pan. Add any accompaniments and serve!


Wednesday, 14 August 2013

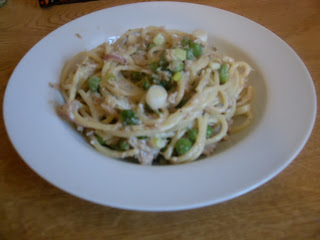
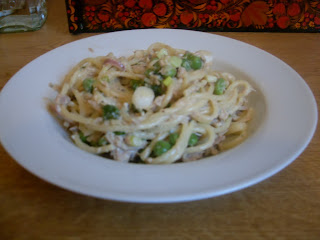
Tuna, Pea, Onion and Cheese Spaghetti

Here is a simple yet tasty supper or lunch. This was another of my 'store cupboard suppers' as I created it with what I had left in the fridge. It turned out very tasty!

Ingredients (serves 2 with a little extra for the fridge):
Tin of tuna, drained
4 cloves of garlic, finely chopped
4-5 spring onions, sliced
1 small red onion, finely sliced
About 50g soft cheese (or whatever's left in the bottom of the tub!)
Green Chilli, finely chopped (optional)
Grated Italian hard cheese (Parmesan, Grana Padano, Pecorino etc.)
Handful frozen peas
salt, pepper 
Dash of olive oil
Spaghetti (or Linguine) boiled until al dente
Dash of white wine
Handful flat leaf parsley, finely chopped


Method:
  1. Cook the pasta and heat the oil in either a frying pan or wok.
  2. Add the red onion to the oil and fry on medium for a few minutes. Now add the garlic, chilli (if using) and peas. Fry for another couple of minutes before adding the cheese to the pan and a dash of white wine.
  3. Turn up the heat a little and when the cheese has melted a bit add the tuna, spring onions, parsley, a sprinkle of hard cheese and season with salt and pepper.
  4. Once heated through toss in the spaghetti with a little pasta water. Serve and garnish with hard cheese, parsley and a grinding of fresh black pepper. Bon Appetit!


Cava and Valencian Orange Leopard Cakes

This is another of my sallies into cake baking. I shan't write the recipe out as it is just the same as the Honey and Sicilian Lemon Cupcakes (see back catalogue) with a few changes. I used Valencian Orange flavouring instead of lemon and I used Cava to bind the cakes instead of milk/honey. These cakes actually went better than the lemon ones, the consistency was softer. I made a marble effect in the cake by colouring a small amount of the cake mix orange with a mix of yellow and red food colouring and swirling it into each individual cake. My icing actually went better this time, I think I used too much butter last time. I also bound the icing with cava and flavoured it with Valencian Orange flavouring.

Before going in the oven I swirled in some orange cake mix.

The marbled effect before icing.

Cakes now iced, time to decorate!

I chose to decorate with edible silver balls and mini candied orange jelly slices.

Delicious!


Plaice Goujons served with a Salsa Verde in a Potato Basket

I've had a break from cooking recently as I've been working and I went to Berlin. So for my first recipe in a while I decided to try something interesting. I came up with this recipe myself and this is the first time I've attempted potato baskets. I'd probably try and make them a little bigger next time and grease the tins with oil rather than butter as a lot of them stuck - but thankfully 2 out of 8 turned out okay! This was delicious and an easy one to spice up by just adding spices and/or chopped chillies to the potato basket mix and Plaice batter!

Ingredients (serves 2):

2 Plaice fillets (filleted and sliced into goujons)
1 Egg (beaten)
Breadcrumbs
Plain Flour
2 Large Potatoes
Olive Oil
Salt
Pepper
Pinch of Paprika, Cayenne and Turmeric
Sunflower Oil (for deep frying)
1 Lemon (cut into wedges)

For the Salsa Verde: Handful of capers, generous handful of parsley, very generous handful of basil, pinch of Mint, pinch of Rosemary, Salt, Pepper, dash Extra Virgin Olive Oil, dash White Wine Vinegar, one green chilli (deseeded).

Method:
  1. Make the Salsa Verde first to give the flavours time to intensify. Basically, just blend all the ingredients for it together, adding more oil to get the desired consistency. It should be like a dip. Put in the fridge.
  2. Now for the potato baskets. Peel and grate the potatoes raw then put the grated potato in a muslin cloth and squeeze out as much liquid as possible. Pre-heat the oven to about 180 degrees, then well combine the grated potato in a bowl with salt, pepper, spices and Olive Oil. Grease a muffin tin or ramekins and shape baskets into it. Make sure there are no gaps so the salsa can't leak out later on. Bake in the oven for about 30-40 minutes or until golden brown.
  3. For the goujons pre-heat the sunflower oil in a deep frying pan (be very careful as hot oil can be very dangerous). While the oil is heating coat each goujon first in flour (sprinkled with salt, pepper and spices), then in the beaten egg and finally in the breadcrumbs. 
  4. Check the oil is hot by dropping in a breadcrumb and seeing if it sizzles. Lay the goujons in individually, laying them away from your person. These will only take a minute or two each to cook depending on their size. When the breadcrumbs turn a dark golden brown they should be done. Lay the goujons on a piece of kitchen roll to drain away excess oil.
  5. To serve, place the goujons in a nice stack, place a warm potato basket to the side and fill with Salsa Verde and place lemon wedge on top.  Serve alone as a starter portion or with a side salad/green beans as I did to make a full meal. A green delight on a plate!


Saturday, 10 August 2013

Onion, Rosemary and Garlic BBQ Burgers

A while ago I got an old-fashioned hand mincer and have been wanting to use it:


Now it's the sunny season I finally can! Here is a simple and delicious BBQ burger recipe. Obviously it is fine to use bought mine but I used a combination of frying steak and rump. Unfortunately I was having such a nice time I forgot to take a photo of the burgers once cooked, but I still decided to include this recipe as they were delicious!


Ingredients (makes about 4 large burgers, or 8 small):
3 minced steaks or a large packet of mine
1 white onion, finely chopped
3-4 finely chopped garlic cloves
Very generous handful finely chopped Rosemary
Salt and freshly ground pepper
1 large egg, beaten

Method:
  1. Basically, combine everything! I liked using my hands for this making sure everything is well incorporated/mixed in.
  2. Shape into patties and lob on a sizzling hot BBQ. When cooked to your liking (I like mine well done), serve in a bun with whatever you like! We had options of cheese, tomato, salad, pineapple and a selection of spicy sauces. Yum!


Gooseberry and Strawberry Tart

Recently a colleague gave me a load of gooseberries from her garden and I was looking for something nice and summery to do with them for a dessert at a BBQ. I made some jam with the spare ones but I decided to make a tart, as I can't remember ever making one before. I chose to pair the gooseberries with strawberries to offset the bitterness. This was quite an easy recipe with a very tasty outcome!


Ingredients:

For the Pastry:
200g Plain Flour
1 heaped tbsp Icing Sugar
120g Butter (unsalted), cubed
1 egg yolk (save the white)
Milk
Pinch of salt

For the Filling:
200g Gooseberries
200g halved Strawberries
Zest and small squeeze of juice of 1 Lemon
3 tbsp ground Almonds
1 Egg white (saved from the pastry) lightly beaten

Method:

  1. For the pastry; rub together the flour, sugar, butter and salt with your fingertips until you get a breadcrumb-like consistency. Add the egg yolk and enough milk to bring the mixture together into a clumply dough. Knead lightly on a floured surface until it will shape into a ball. Wrap in clingfilm and chill in the fridge for half an hour.
  2. Combine the berries, sugar, lemon zest and juice and set aside to macerate for at least half an hour. (At this point I also added a little cheeky splash of Brandy!)
  3. Pre-heat the oven to 200 degrees and grease/line your chosen vessel. I chose a pie dish but you can create this whichever way you like.
  4. On a floured surface roll out just over half the pastry, quite thinly, and place in dish for the base. Leave a little too much as the edges will shrink a little when it bakes, you can cut any extra off later. Blind bake this for a few minutes in the oven. A good tip here, if you don't have baking balls like me, is to use rice or beans wrapped in tin foil to keep the base down. I used rice and the good thing is you can use the rice/beans again after use - just put them back in the packet!
  5. Cut the remaining pastry for your tart top. I decided to go for a latticed design but it's completely up to you.
  6. Spoon the fruit into the blind-baked pastry case with a small amount of the juices. Sprinkle over ground almonds and complete pastry topping to your liking. I did this by placing the strips of pastry over the top. Brush top with egg white and sprinkle over some granulated sugar.
  7. Bake for half an hour or until the pastry turns a deep golden colour. Serve warm with cream (or ice cream if you prefer!).


Monday, 22 July 2013

Alice's Supper Spaghetti Soup

This is one of Paddy and my favourite quick and easy teas! It is another 'store-cupboard' supper because you can pretty much lob anything in and is a great way to get rid of left overs! This dish is extremely tasty and we always end up licking the bowl. I will be very loose with quantities in this as it changes each time, I literally cook it each time to what I have left in the fridge.

Ingredients:
Chicken Stock (see Alice's Basics section)
Spaghetti
Tomatoes (halved)
Parmesan (or other Italian hard cheese)
Black Pepper
Possible optional extras: finely chopped garlic, Onions (red or white), Spring Onions, Shredded Chicken, Asparagus, Leeks, Broccoli, Cabbage, Courgette, Peas etc. Basically any vegetable or meat that is not too heavy.

Method:
  1. Bring the stock to the boil.
  2. Add the spaghetti, tomatoes and add the optional extras as the spaghetti cooks as you see fit, for example if I'm using left over shredded chicken or spring onions I don't add them until the end as I don't want them to cook and with asparagus I'll add that at the start as I want it to soften.
  3. When the spaghetti is al dente serve immediately with Parmesan and cracked black pepper liberally sprinkled over the top, easy!


This can also be easily changed to an Asian-style dish by using noodles instead of spaghetti, adding some Asian flavourings (such as Soy Sauce and Star Anise), omitting the Parmesan and using extras like beansprouts, edamame beans, bamboo shoots etc.


Monday, 15 July 2013

Honey and Sicilian Lemon Cupcakes

I don't normally bake sweet things as I prefer savoury, but due to new purchases of piping bags and cake tins I thought I'd give the ever-popular twee favourite of cupcakes a go. If you can't beat them, join them! But of course, I couldn't just leave them as boring sponge so I found some Sicilian Lemon flavouring at the shop and decided to use that along with fresh lemons, unfortunately not Sicilian ones but these were very tasty none the less!
Ingredients (makes 12):
250g Butter (150g for cakes, 100g for icing)
100g caster sugar
2 medium eggs, beaten
150g Self-raising flour
225g golden icing sugar
50g soft cheese
Yellow food colouring
Sicilian Lemon flavouring
2 tbsps Honey
1 Lemon, zested and squeezed for juice
Candied mini slices of lemon and lemon sugar crystals (to decorate)
Method:
  1. Preheat oven to 190 degrees, put paper cases into baking tin.
  2. Beat the butter, sugar and honey together until pale and creamy and add half the lemon zest. Gradually add the eggs, beating between additions, making sure well incorporated.
  3. Sift in the flour and mix in gently. Spoon mixture into baking cases.
  4. Bake for around 20 minutes, or until a skewer inserted into the middle of the cakes comes out clean.
  5. Meanwhile, make the icing. I made two different shades of yellow and a double piping bag to try and create a swirl effect, to do this I just divided the quantities between 2 bowls. Beat the butter until light and fluffy then beat in the icing sugar gradually. Add extra lemon zest, more flavouring and clouring accordingly. Put into piping bag and leave in the fridge to set a little.
  6. Let the cakes cool in the tin for a few minutes once taken out of the oven then cool on a wire rack. Once cooled, decorate however you like, enjoy!


I'm trying to branch out into sweet cooking/baking but it's difficult as both Paddy and I have a savoury, spicy tooth, not a sweet one! Let me know if you'd like to be my sampler!